Easy Oven Roasted Bell Peppers
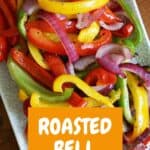
This easy recipe for oven roasted bell peppers is a healthy and simple side dish that takes only 20 minutes to get on the table! Learn how to easily roast peppers with this step by step tutorial and video!
Want to save this recipe?
Enter your email & I’ll send it to your inbox. Plus, get great new recipes from me every week!
I’m a huge fan of bell peppers, they are one of my favorite veggies! Not only are these sweet peppers delicious but they are also packed with vitamins and minerals but also may help eye health and help prevent anemia! (Source)
There are many methods of roasting peppers but the one I’m sharing today is my absolute favorite. It takes just five minutes to prep and twenty minutes in the oven!
Prefer the grill? Hop over to my easy Grilled Peppers recipe!
Step by step
Roasting peppers is just a matter of chopping, seasoning, and cooking quickly in high heat.
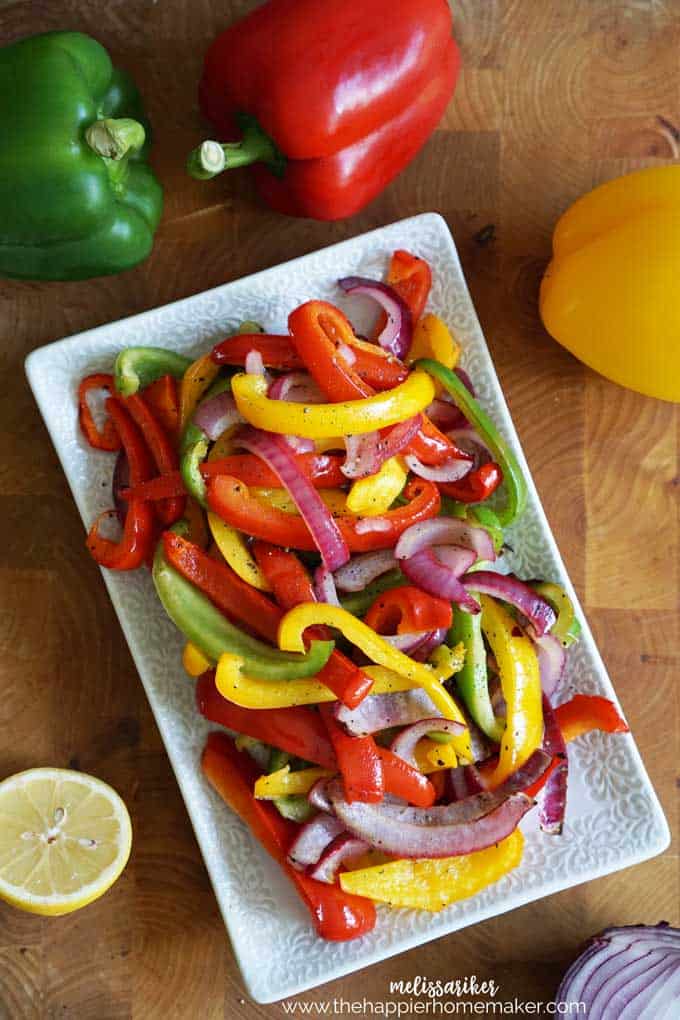
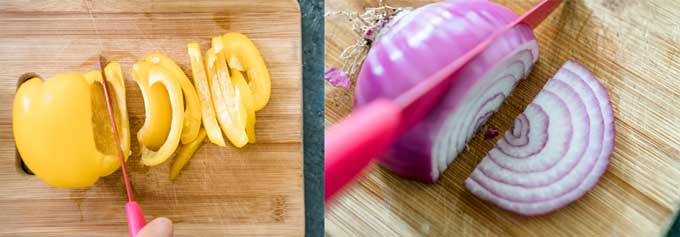
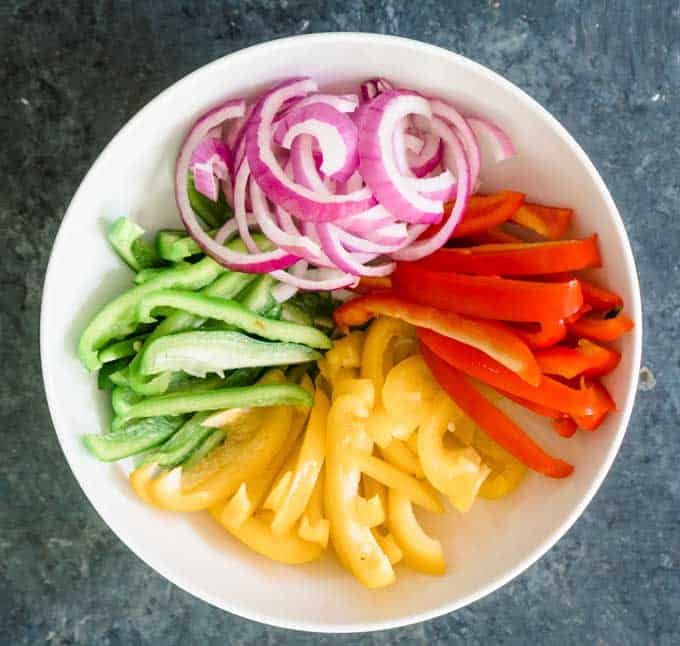
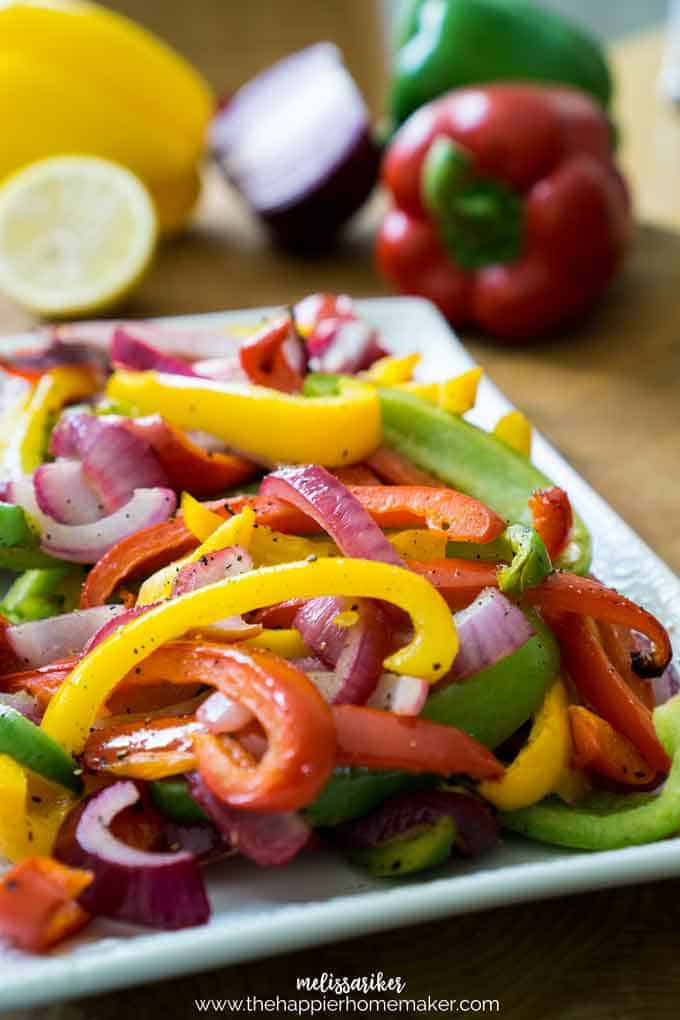
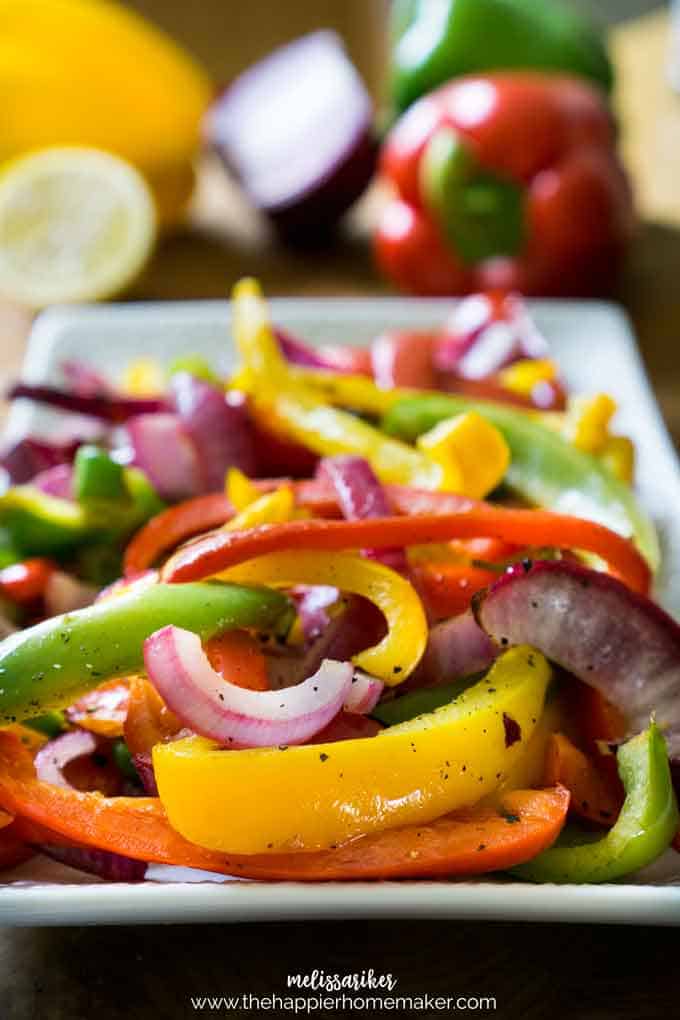
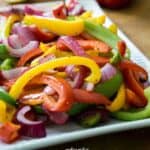
Chop the peppers and onion into about 1/4 inch strips and roast in a 450-degree oven. Using thinner or thicker strips will affect cooking time.
Choosing peppers for roasting
You can roast any kind of peppers. My favorite is roasted red peppers but I often combine and roast multiple colors of bell peppers together.
You can also use this method to roast other types of peppers like mini peppers or poblano peppers but you may need to adjust the cooking time for smaller peppers as they will roast faster.
I also usually use red onion when roasting peppers and onions together but white, yellow, and sweet onions like Vidalia onions all work perfectly as well.
Seasoning options
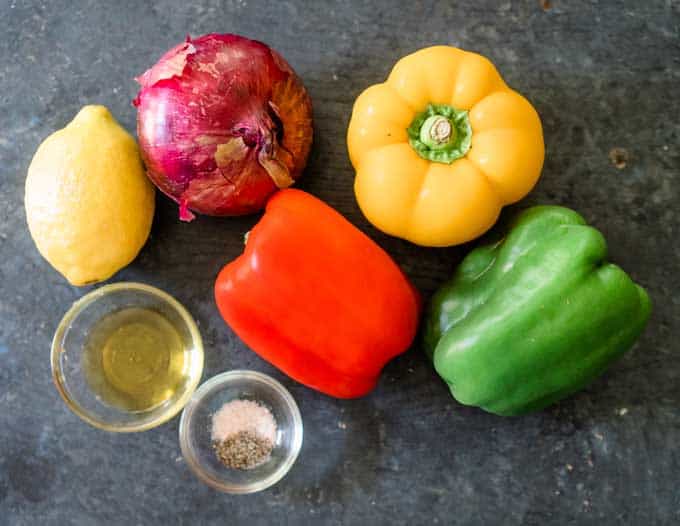
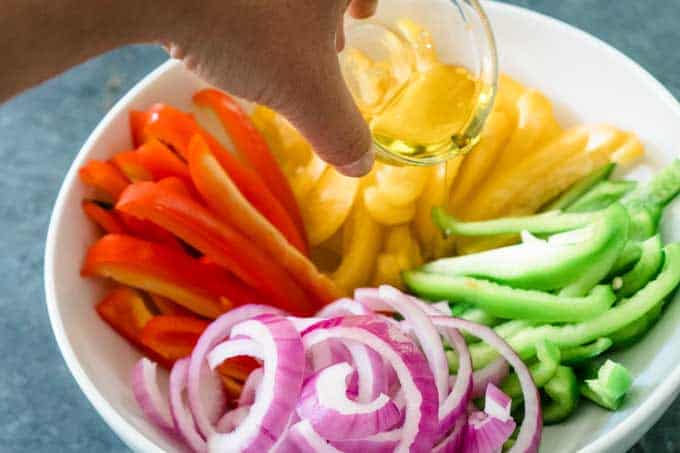
I like to roast my peppers and onion together in the oven along with a little olive oil, salt and pepper, and lemon juice.
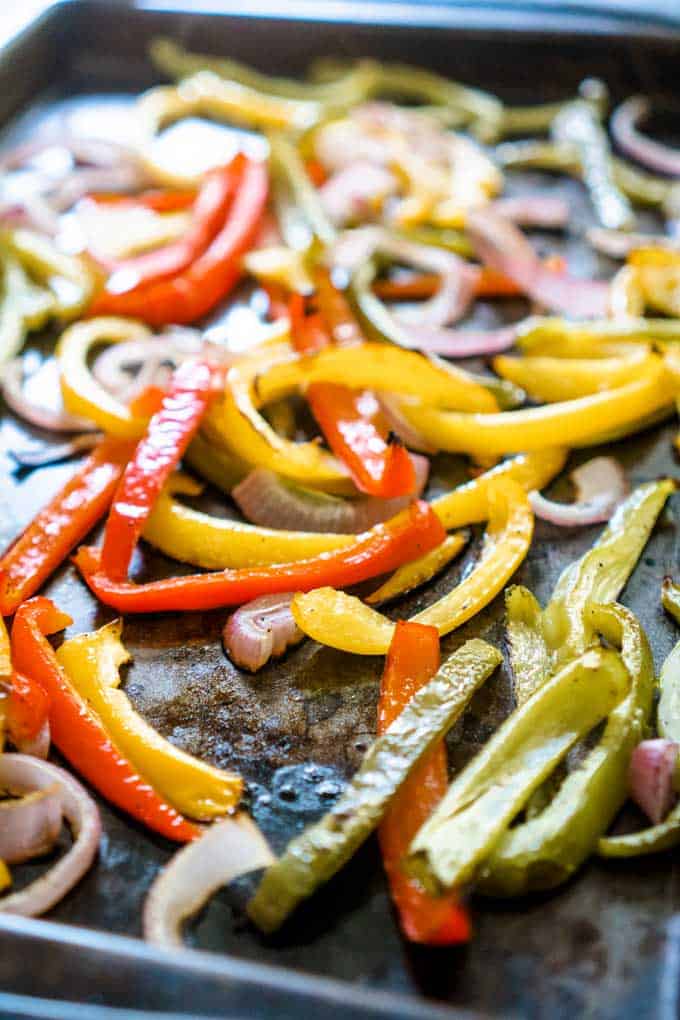
The sweetness of the roasted bell peppers stands out along with a slight smokiness from the roasting process. You can also experiment with adding herbs like oregano or red pepper flakes.
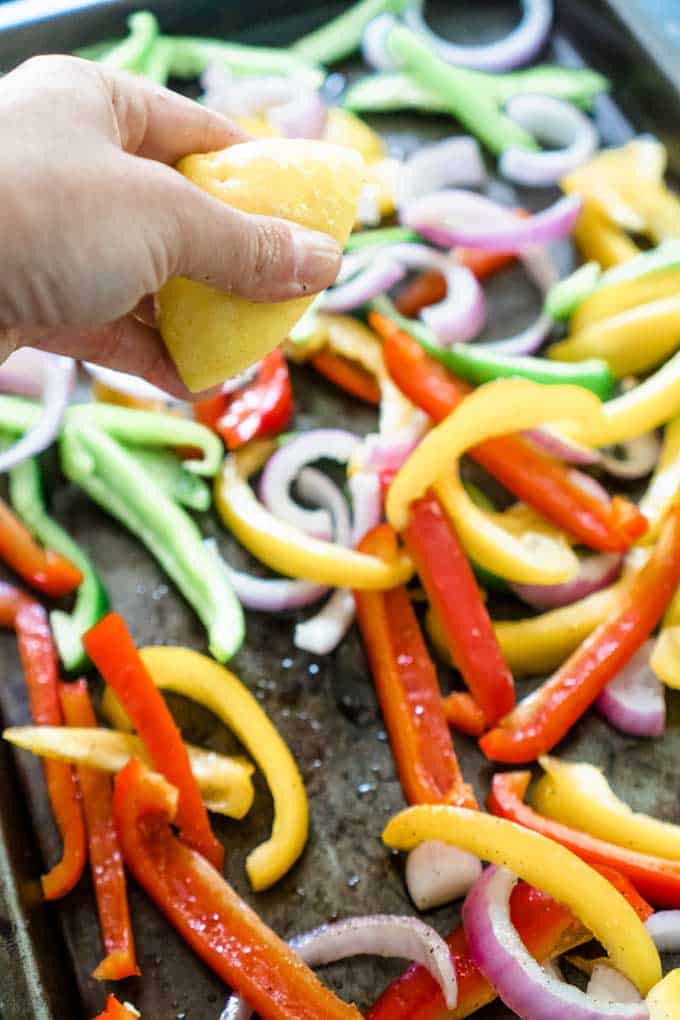
After tossing the peppers with the olive oil and seasoning arrange them on a baking sheet and squeeze half a lemon over them, it really seals the flavor! Then roast for twenty minutes and enjoy!
Tips for best results
- Good, fresh peppers will be firm and glossy. The skin should be taut and unwrinkled, and the stems fresh and green. Avoid peppers that have soft or shrunken areas or black spots.
- Do not crowd the peppers and onions on the baking sheet, doing so will result in them steaming rather than roasting and give a different flavor and texture.
- Store the roasted peppers in an airtight container in the refrigerator up to 3-5 days. These roasted peppers can be frozen up to six months. Thaw in the fridge and use within 3 days of thawing.
Serving suggestions
There are tons of options for what to serve with roasted peppers, they are so versatile!
I like to serve these peppers as a side dish but you can also add them to fajitas, salads, pasta, pizza, scrambled eggs or omelets, tacos, or even a sandwich. They add a ton of flavor however you choose to serve them!
If you like these Roasted Bell Peppers you might also like to try my Roasted Sweet Potatoes, Maple Roasted Carrots, or Oven Roasted Vegetables.
FAQs
While jarred peppers are often peeled, this recipe cooks the skin so tender there is no need to peel them before roasting.
Bell peppers are an amazing source of vitamin C, the red peppers in particular have six times the amount of vitamin C as citrus! According to Consumer Reports, while you do lose some vitamin C when cooking bell peppers, roasting is a good way to keep the bulk of it and the cooking process breaks down cell walls making the carotenoids easier to absorb!
You can absolutely leave out the onion if you desire. It adds a little extra flavor but your roasted peppers will still taste amazing without it.
Yellow, orange, and red bell peppers are essentially green peppers that have been allowed to ripen. Red bell peppers are fully ripe which means they are allowed to grow for the longest amount of time (hence the usually higher price tag) and they will have the sweetest taste.
Green peppers are picked sooner and have a slightly more bitter taste and the yellow and orange are in the middle of the spectrum. The longer the pepper ripen the sweeter they become and the higher the vitamin C content.
If you try this recipe please comment and rate it below, I love hearing from you!
If you liked this recipe, you’ll love my free 5-Ingredient Dinner Challenge.
I’ll send you super simple meals that use just five ingredients and come together fast — perfect for busy weeknights when you don’t want to overthink dinner.
Easy Oven Roasted Peppers
- Total Time: 25 mins
- Yield: 4 1x
Description
This easy recipe for oven roasted bell peppers is a healthy and simple side dish that takes only 20 minutes to get on the table! Learn how to easily roast peppers with this step by step tutorial and video!
Ingredients
- 1 each red, yellow, and green bell peppers
- 1/2 large red onion
- 1 tablespoon extra virgin olive oil
- 1/2 lemon
- salt and pepper to taste
Instructions
- Preheat oven to 450 degrees.
- Slice peppers and onion into thin (about 1/4 inch) strips and place in a medium bowl.
- Add olive oil and salt and pepper and use your hands to mix, being sure each piece of the veggies are thoroughly coated.
- Arrange veggies on a baking pan ensuring not to overcrowd them.
- Squeeze lemon over vegetables.
- Bake for 20 minutes or until edges start to turn black. Serve warm or cool.
Notes
- Good, fresh peppers will be firm and glossy. The skin should be taut and unwrinkled, and the stems fresh and green. Avoid peppers that have soft or shrunken areas or black spots.
- Do not crowd the peppers and onions on the baking sheet, doing so will result in them steaming rather than roasting and give a different flavor and texture.
- Store the peppers in an airtight container in the refrigerator up to 3-5 days. These roasted peppers can be frozen up to six months. Thaw in the fridge and use within 3 days of thawing.
- Prep Time: 5 mins
- Cook Time: 20 mins
- Category: vegetable
- Method: roasting
- Cuisine: American
Nutrition
- Serving Size: 2/3 cup
- Calories: 72
- Sugar: 5.4 g
- Sodium: 4.7 mg
- Fat: 3.9 g
- Carbohydrates: 9.4 g
- Protein: 1.2 g
- Cholesterol: 0 mg
This post was originally published in August 2016 and updated with additional pictures and details in June 2019.

Thanks. Plan to try this, Lord’s willing. I’ve always sauteed them on the stove.
I absolutely love this recipe! The roasted bell peppers turned out so sweet and flavorful. I added a sprinkle of garlic powder before roasting, and they were a hit at dinner. Thanks for sharing such an easy and delicious way to enjoy bell peppers!
I absolutely love this recipe! The roasted bell peppers turned out perfectly and added such a vibrant flavor to my meals. Thank you for sharing such easy and delicious ideas! Can’t wait to try more of your recipes!
I like this a great and quick side dish.
I added halved garlic cloves to it really good.
Why do you add lemon juice to the peppers ? Also, Will it give a lemon taste?
Thank you
Lin
There is no overt lemon taste to the cooked dish but you can omit it if you prefer.
Can you make these on the gas grill?
This recipe has grilling instructions, https://thehappierhomemaker.com/easy-grilled-peppers-recipe/
turned out perfectly, thank you for such an easy and yummy recipe!
I followed the directions exactly, twice. The peppers burned both times. I roast broccoli at 400 for 7 minutes. 25 minutes at 450?? Impossible
I’m sorry it didn’t work for you Christine, are you sure your oven is working at the proper temperature? This recipe first published in 2016 and I’ve never had that complaint and I use it all the time…just trying to brainstorm what could have gone wrong?
I made these peppers this evening and they were perfect. I cannot understand how Christine’s were burnt. I can only assume that her cooker may be faulty or she is using the grill instead of the oven.
Delicious and easy to make, will make it again and again
My favorite easy veggie side dish!
Delicious!!
Would love to print this recipe but all I get is the ads that cover up the content.
Make sure you highlight the content you wish to print and choose “selection” as the setting before you print.
Paper and pen. 😉
i have just started slimming world diet need speed food meals if anybody has any would be very grateful
Their so yummy. I like them pre-baked too – delish (the peppers that is)
I’m so glad you enjoyed them! ~Melissa
after I do this can I put them up in the freezer to use at later date?
I have not tried but I don’t think they would hold up well in the freezer Phyllis. If you give it a try please come back and let us know how it worked! ~Melissa
Hi! How many servings does this recipe provide?
Your recipe says serve immediately. But can they be eaten at room temp., perhaps the next day?
You can definitely eat these at room temp or the next day Mary Ann, I usually have leftovers the next morning with my eggs! ~Melissa
I love roasted vegetable but for some reason, I never think about peppers. These look delicious…
picking up some tomorrow from our farmer’s market and making these!
Let me know what you think after you try them Char-I made these again just for a snack yesterday! ~Melissa