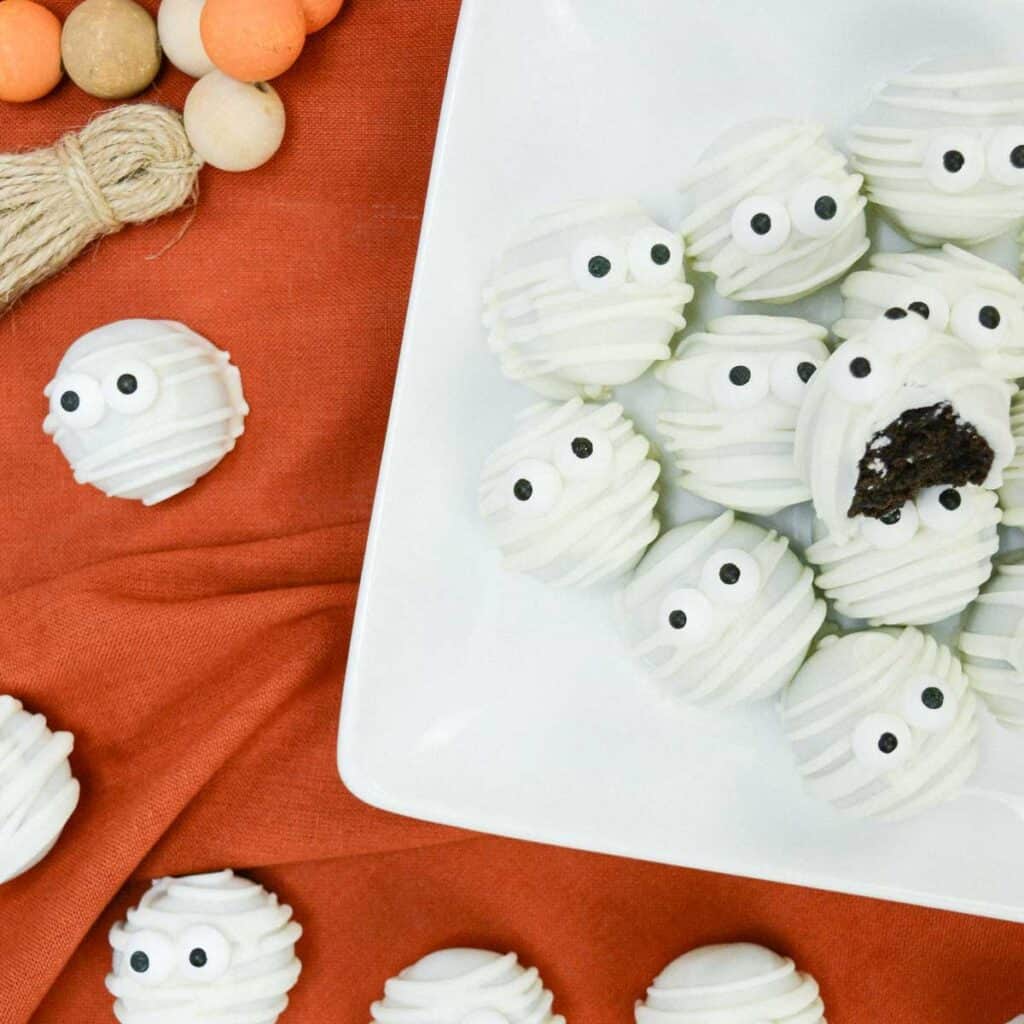
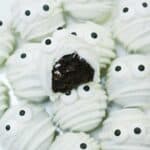
Halloween Mummy Truffles
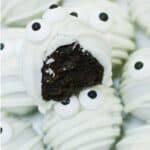
Looking for an adorable Halloween truffle recipe? These adorable mummy truffles are easy to make, delicious, and sure to be the hit of your Halloween parties!
Want to save this recipe?
Enter your email & I’ll send it to your inbox. Plus, get great new recipes from me every week!
Halloween is a fun excuse to get creative in the kitchen! With so many Halloween parties and get-togethers, there’s always a reason to make some cutie-patootey recipes like today’s mummy truffles! Serve them up alongside our Halloween strawberry ghosts and Halloween snack mix to make your party a spooktacular time or pack them up to boo your neighbors!
Why I love this recipe
- made with OREOS, you know they are my favorite! (see my OREO dirt cake or OREO mint truffles)
- you only need about 15 minutes of active prep time to make these (and 30 minutes of chill time)
- they are just so easy and practically fail-proof so its a wonderful beginner recipe
Ingredients
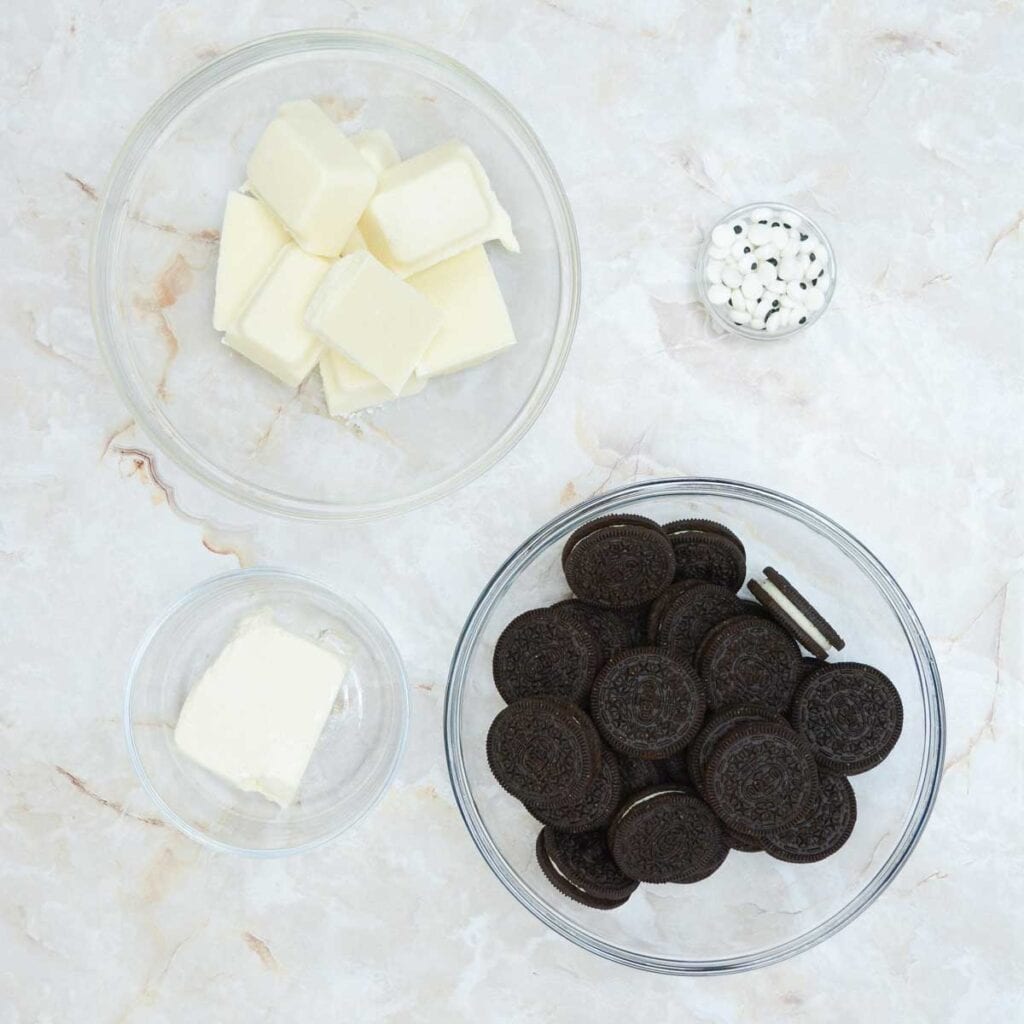
- OREO cookies – I recommend double stuffed but any kind will do
- cream cheese
- white chocolate morsels or white candy morsels
- candy eye balls
Step by step
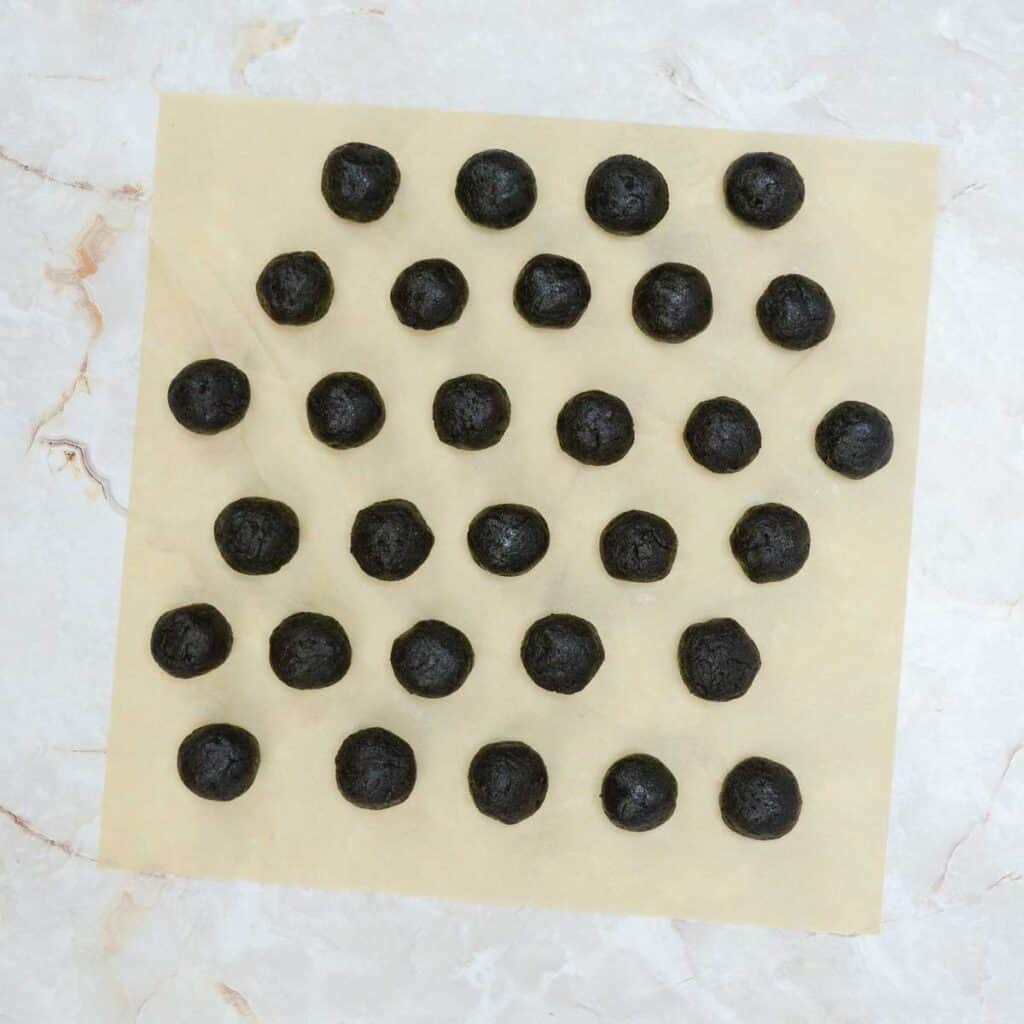
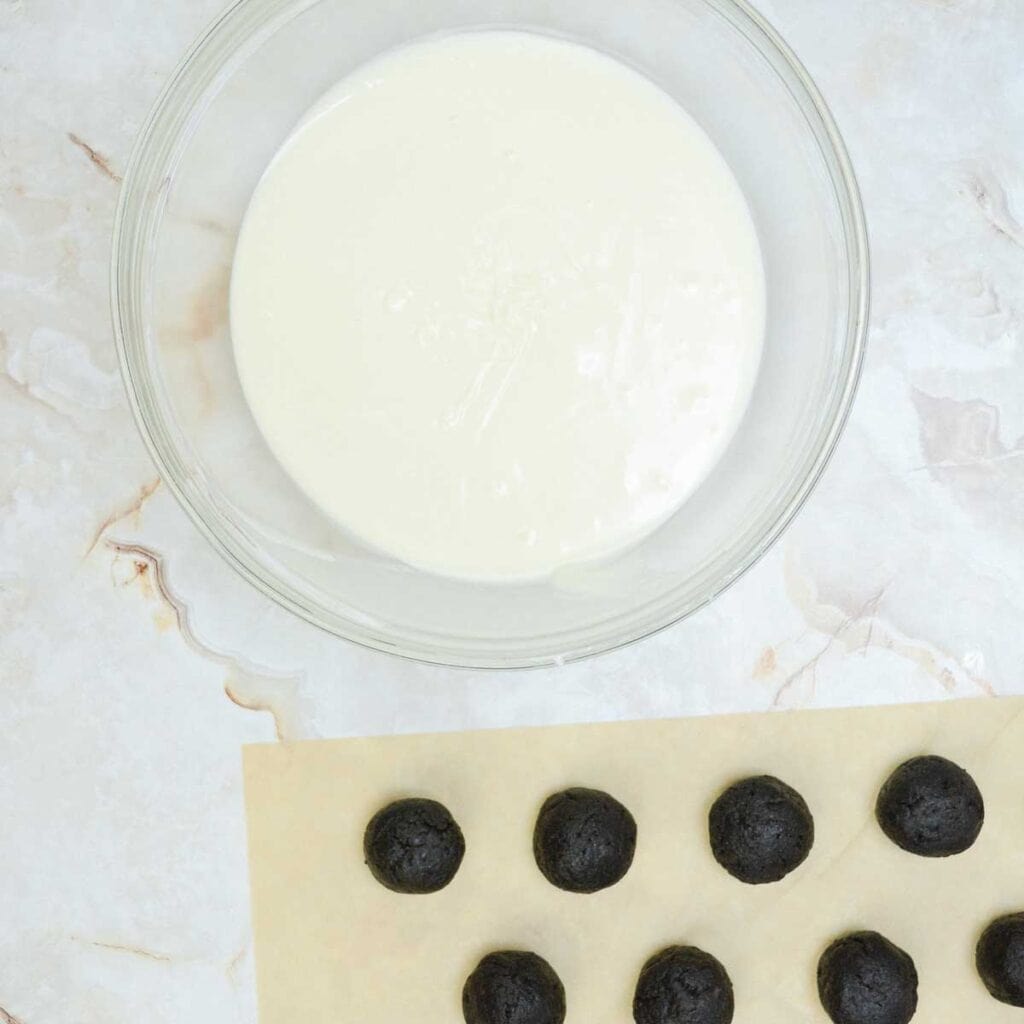
- Start by crushing the Oreos into fine crumbs using a food processor. Move them into a large bowl.
- Blend the softened cream cheese with the Oreo crumbs, ensuring all crumbs are evenly coated, and the mixture forms a less crumbly dough.
- Divide the mixture equally, shaping it into roughly 1-inch balls using a small ice cream scoop or heaping teaspoon. Roll these between your hands to smoothen the edges and place them on parchment paper. Repeat until all the dough is used.
- Put the parchment paper on a cutting board or a sheet pan that fits in your fridge or freezer. Let the dough balls chill for a minimum of 30 minutes, allowing them to firm up.
- After chilling, it’s time to melt the white chocolate. Transfer the white chocolate or candy coating to a microwave-safe bowl. Warm it in 30-second intervals, stirring well each time. Only heat until the mixture is smooth – avoid overheating to prevent scorching the chocolate.
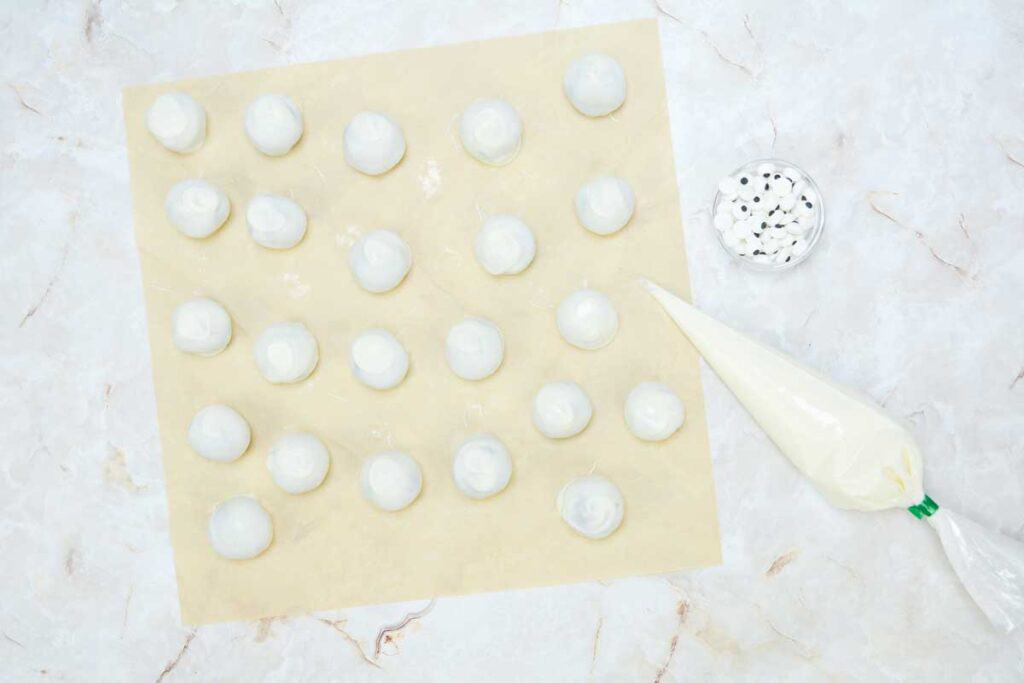
- Once the white chocolate is melted, take one dough ball and use a spoon to roll it and coat it with the melted chocolate. Lift it gently from the mixture, tapping the bowl’s side to remove excess chocolate and letting it drip back for roughly 10 seconds. Carefully set it on the parchment, using the spoon’s tip to smooth any indents left behind. Repeat this process for all the balls until they’re coated in white chocolate.
- Put the remaining melted white chocolate into a piping bag or a Ziploc bag, making a small hole at the bag’s tip.
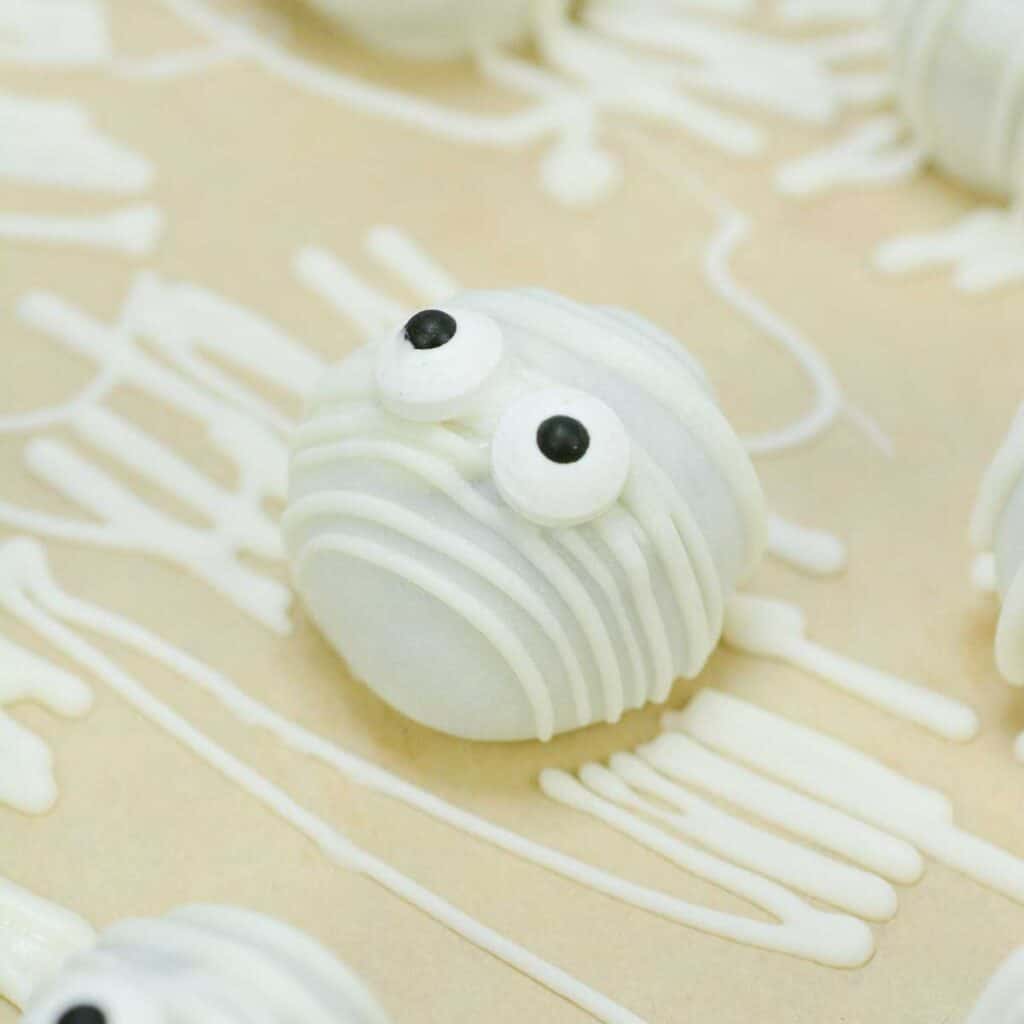
- Moving quickly, drizzle the white chocolate over 2 to 3 dipped balls at a time. immediately add the candy eyeballs and firmly press them into position.
- Allow around 10-15 minutes for the white chocolate to solidify before handling or moving the coated balls.

Storage
Store the halloween truffles in an airtight container in the refrigerator up to 3 days. These also freeze well for up to 3 months in a freezer-safe container (affiliate link) or bag so you can make them ahead of time as well!
If you try this recipe please comment and rate it below, I love hearing from you!
If you liked this recipe, you’ll love my free 5-Ingredient Dinner Challenge.
I’ll send you super simple meals that use just five ingredients and come together fast — perfect for busy weeknights when you don’t want to overthink dinner.
Halloween Mummy Truffles
- Total Time: 45 minutes
- Yield: 24 tuffles 1x
Description
Looking for an adorable Halloween truffle recipe? These adorable mummy truffles are easy to make, delicious, and sure to be the hit of your Halloween parties!
Ingredients
- 25 double stuffed Oreos
- 4 oz cream cheese, softened
- 16 oz white chocolate or candy coating
- Candy eye balls
Instructions
- Crush Oreos into fine crumbs using a food processor or by placing them in a plastic storage bag and rolling them with a rolling pin. Move them into a large bowl.
- Blend the softened cream cheese with the Oreo crumbs, ensuring all crumbs are evenly coated, and the dough is no longer crumbly.
- Divide the mixture equally, shaping it into roughly 1-inch balls using a small ice cream scoop or heaping teaspoon. Roll the dough between your hands until smooth and place them on parchment paper. Repeat until all the dough is used.
- Put the parchment paper on a cutting board or a sheet pan that fits in your fridge or freezer. Let the dough balls chill for a minimum of 30 minutes, allowing them to firm up.
- After chilling, start melting the white chocolate. Transfer the white chocolate or candy coating to a microwave-safe bowl. Warm it in 30-second intervals, stirring well each time. Only heat until the mixture is smooth – avoid overheating to prevent scorching the chocolate.
- Once the white chocolate is melted, take one dough ball and use a spoon to roll it and coat it with the melted chocolate. Lift it gently from the mixture, tapping the bowl’s side to remove excess chocolate and letting it drip back for roughly 10 seconds. Carefully set it on the parchment, using the spoon’s tip to smooth any indents left behind. Repeat this process for all the balls until they’re coated in white chocolate.
- Put the remaining melted white chocolate into a piping bag or a Ziploc bag, making a small hole at the bag’s tip.
- Moving quickly, drizzle the white chocolate over 2 to 3 dipped balls at a time. Immediately add the candy eyeballs and firmly press them into position.
- Allow around 10-15 minutes for the white chocolate to solidify before handling or moving the coated balls.
Notes
Store in an airtight container in the refrigerator for up to 3 days. Freeze in a freezer bag or freezer-safe container (affiliate link) for up to 3 months.
- Prep Time: 15 minutes
- Category: dessert
- Method: none
- Cuisine: American
Nutrition
- Serving Size:
- Calories: 173
- Sugar: 16.1 g
- Sodium: 78.6 mg
- Fat: 10.1 g
- Carbohydrates: 20.1 g
- Fiber: 0 g
- Protein: 1.7 g
- Cholesterol: 8.7 mg


so cute and delicious!
Before you crush the Orio’s do you remove the creamy filling?
no, simply crush the OREOs whole!