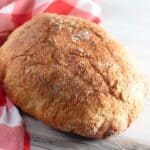
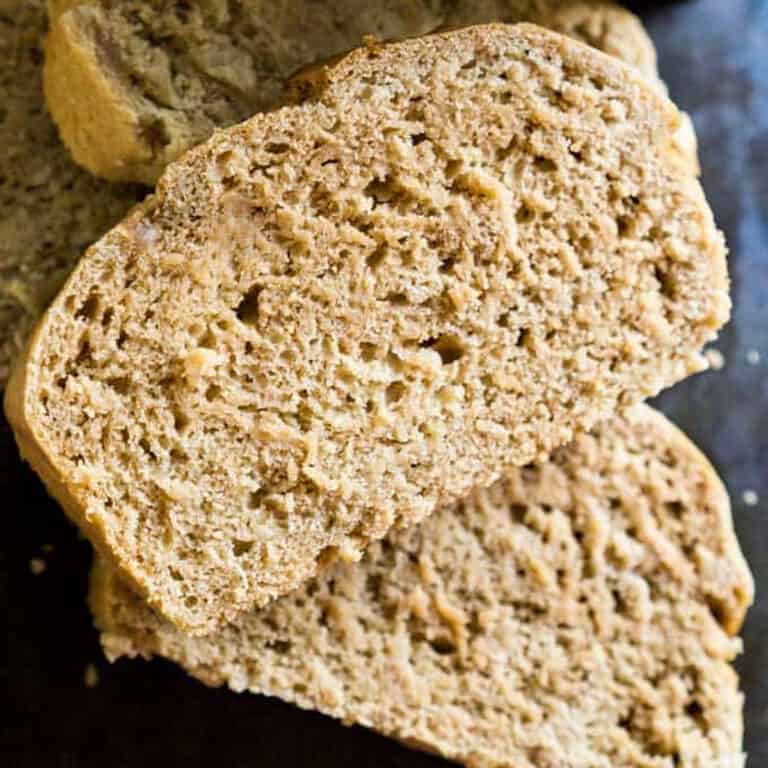
No Knead Dutch Oven Bread

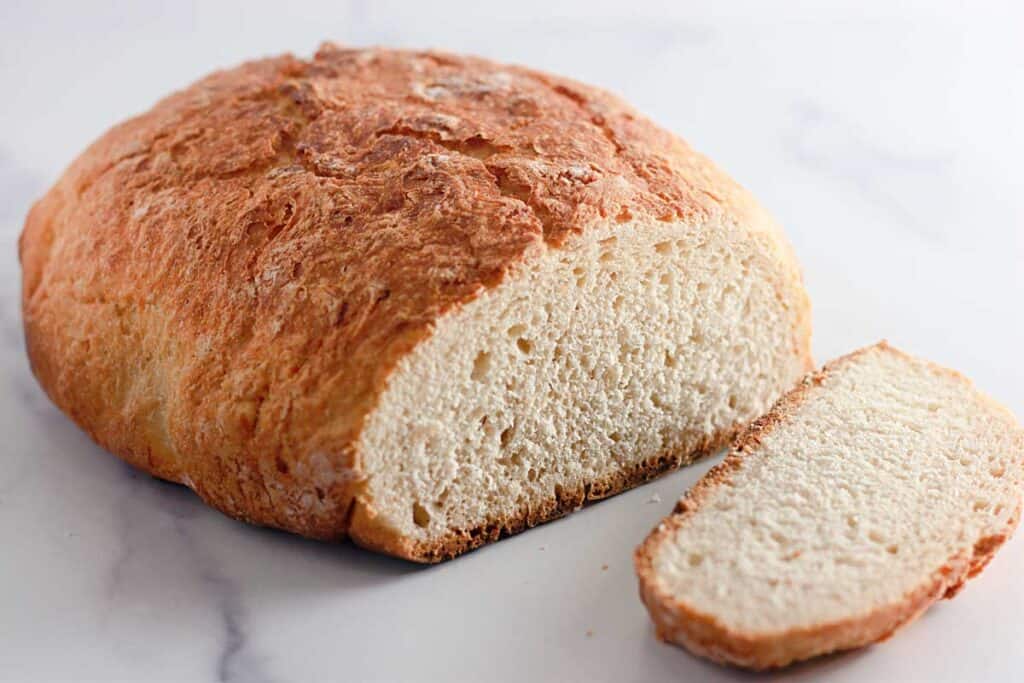
No knead Dutch oven (affiliate link) bread is a deceptively easy recipe for a crusty, artisan loaf of bread. The 5 simple ingredients mix up in just 5 minutes, there is no kneading to messy your hands, and only a short two hour rise time. Once you try this easy bread recipe you’ll be a convert!

Want to save this recipe?
Enter your email & I’ll send it to your inbox. Plus, get great new recipes from me every week!
Imagine a warm, crusty bread with a soft and chewy center that perfectly pairs with your favorite toppings or dips. With no knead Dutch oven (affiliate link) bread, you can enjoy all of that and more, without spending hours kneading or rising the dough.
Why I love this recipe
This recipe is effortless, foolproof, and will make you feel like a bread-baking pro, impressing everyone with your delicious homemade bread. It requires no fancy ingredients, you probably have everything you need already in your pantry. Plus, there’s nothing quite like the aroma of freshly baked bread wafting through your kitchen!
Ingredients
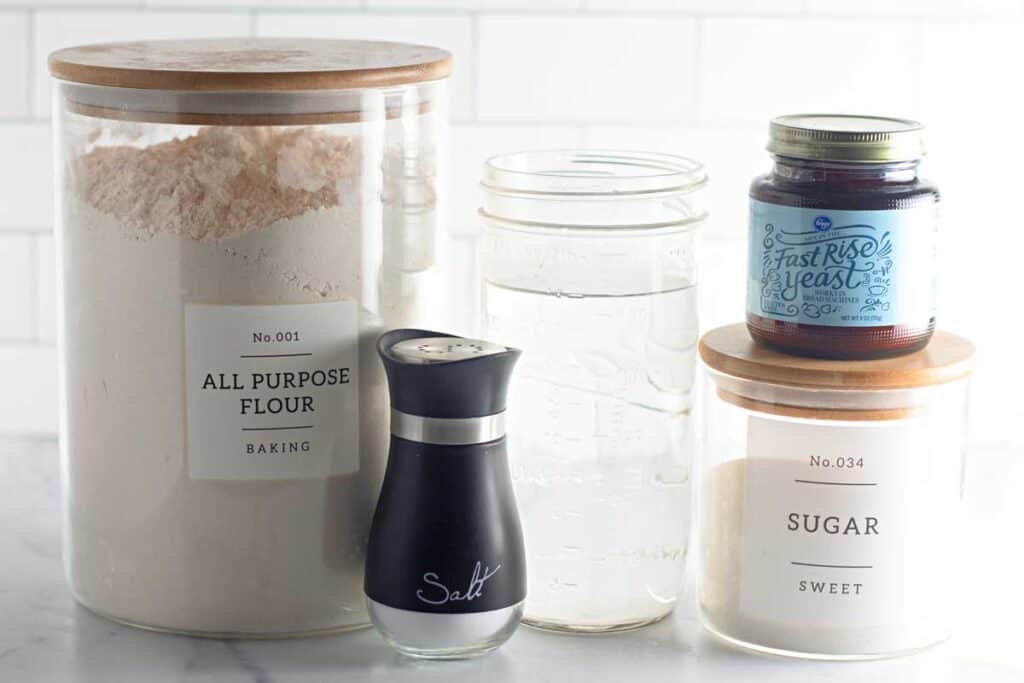
- warm water
- sugar
- dry active yeast
- all-purpose flour
- salt
- oil
Step by step
Make the dough
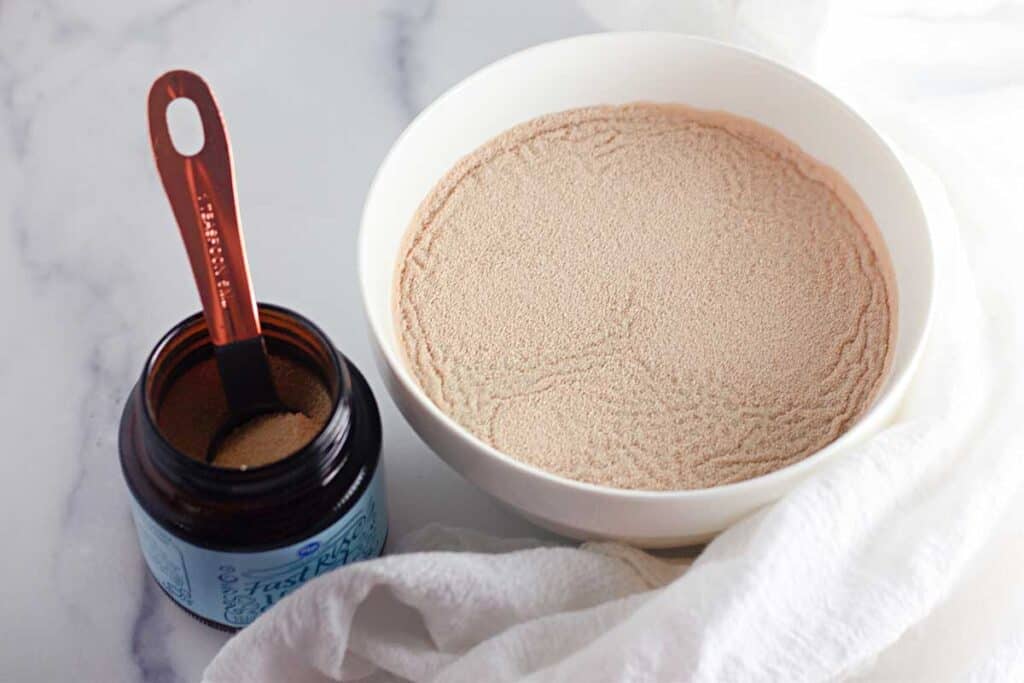
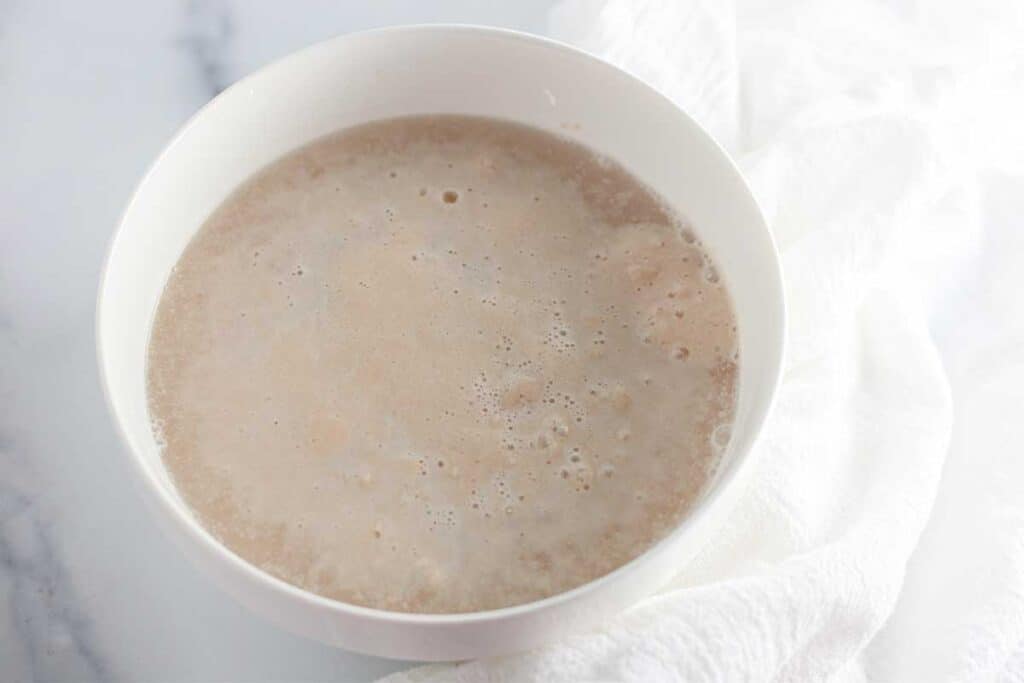
- Combine warm water, sugar, and yeast in a small bowl and set aside for 5 minutes or until frothy. You want the water about 100 degrees, I recommend using a meat thermometer to check it if you aren’t sure if it is warm enough.
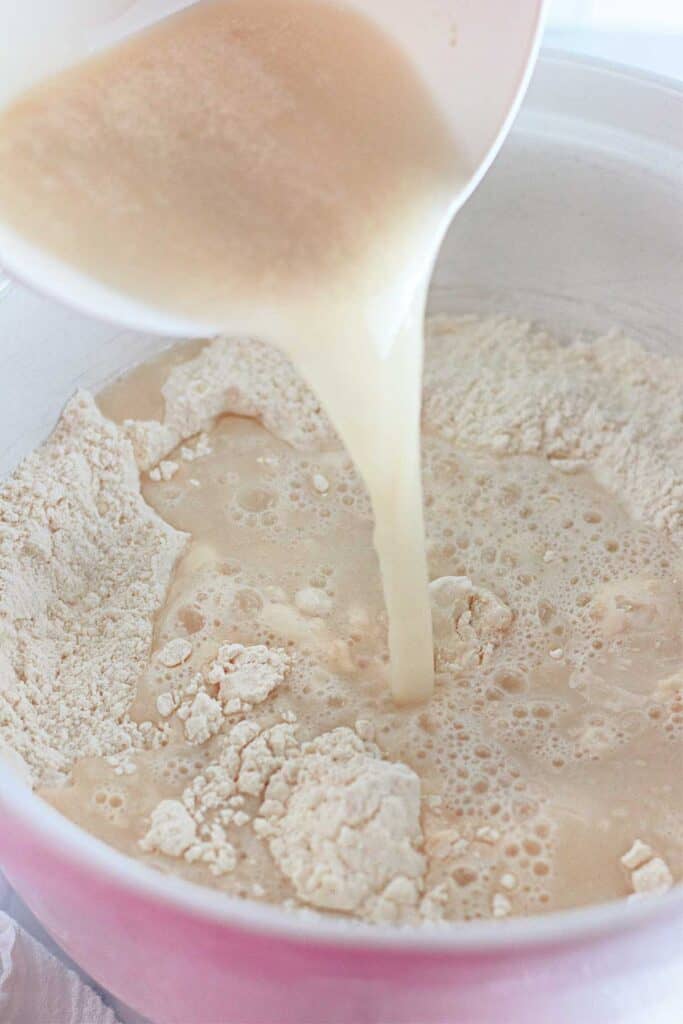
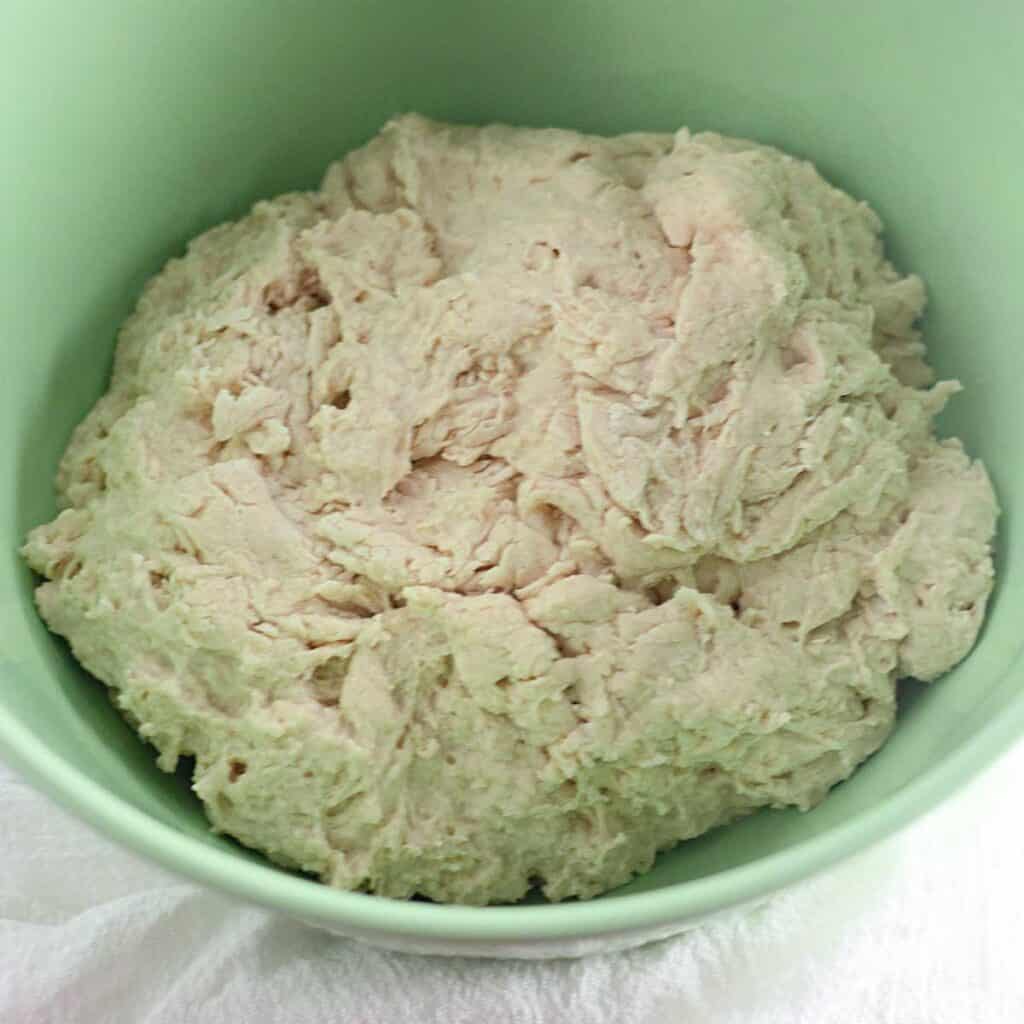
- In a large mixing bowl combine flour and salt, stir to mix.
- Add yeast mixture to flour mixture and stir to form the dough.
Let it rise
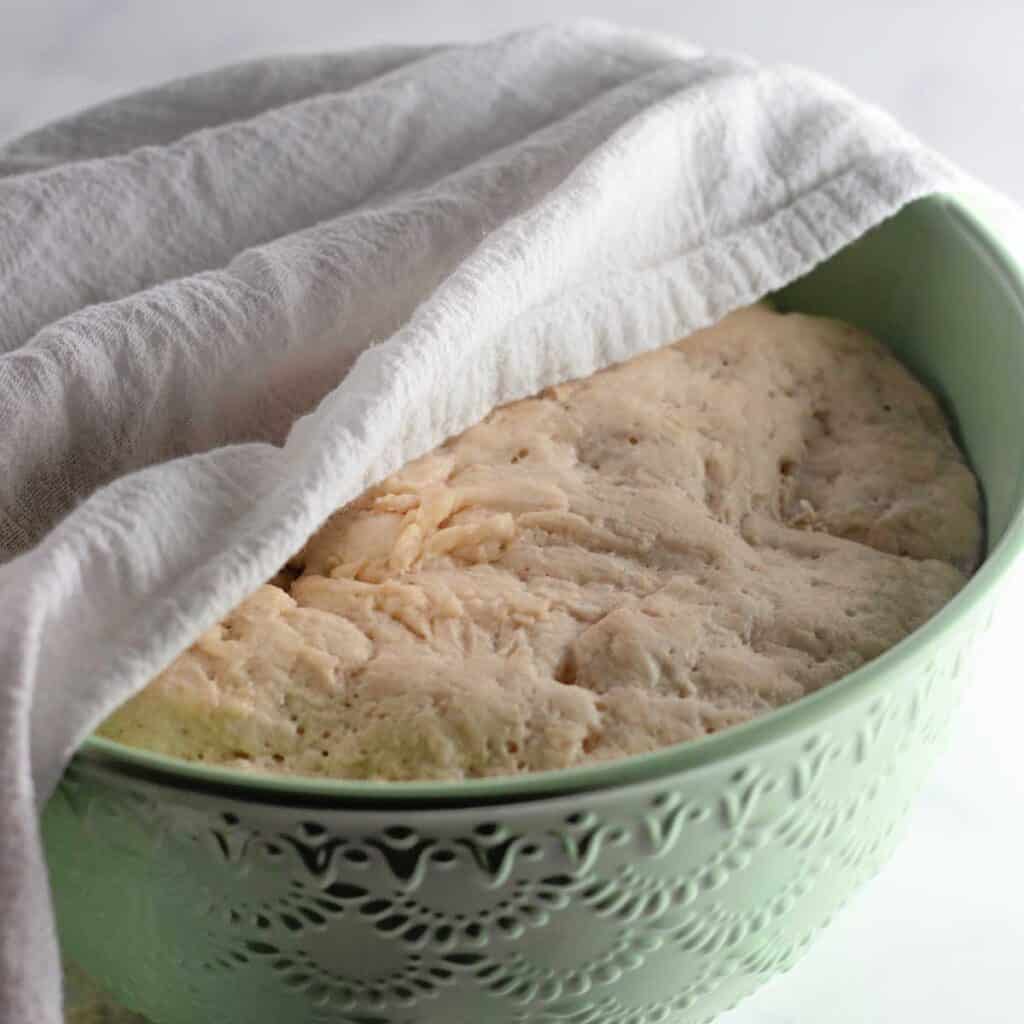
- Grease a separate large bowl and transfer the dough to the second bowl to rise. Turn the dough in the bowl to lightly coat with oil on all sides.
- Cover the dough with a clean towel or paper towels and set in a warm place to rise for 2 hours, or until doubled in size.
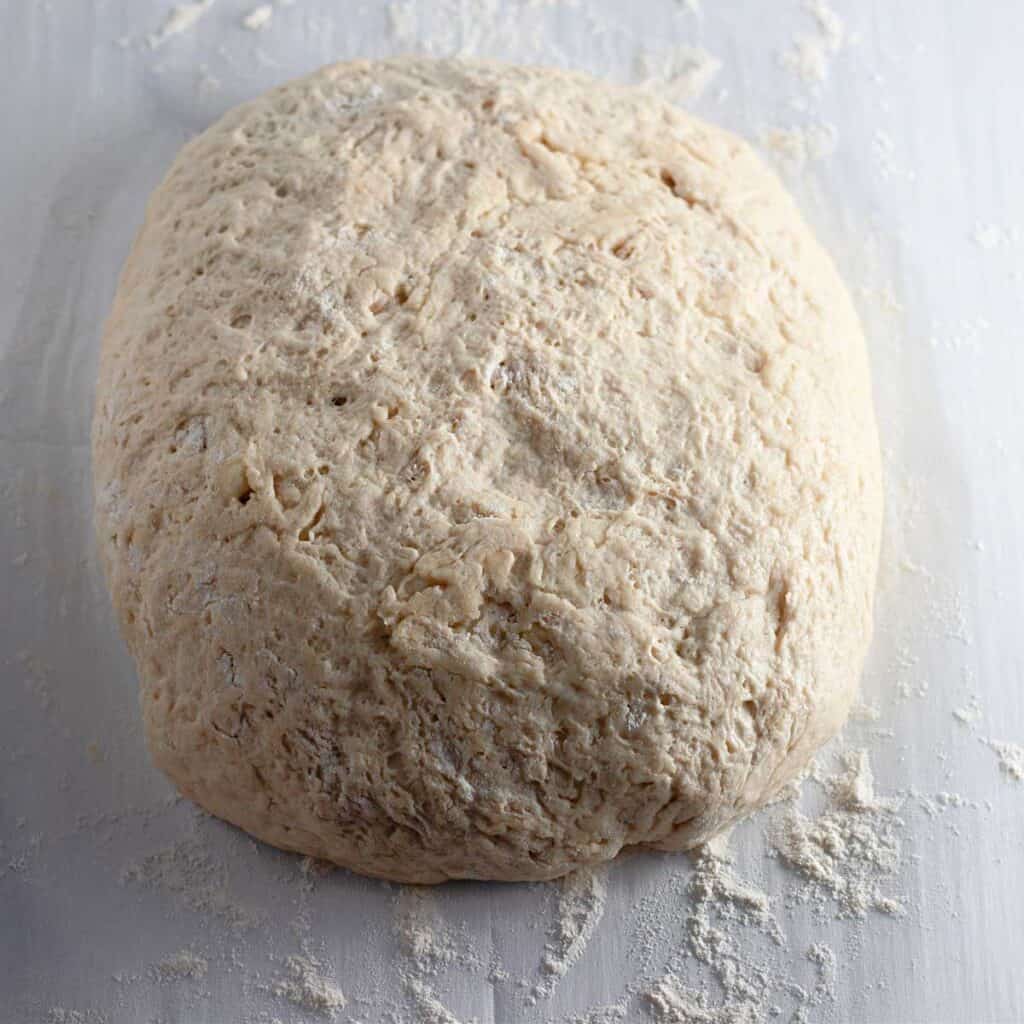
- Dust a large pice of parchment paper lightly with flour. Turn the dough out onto the paper and form into an oval. Cover and allow to sit at room temperature as the oven preheats.
Bake
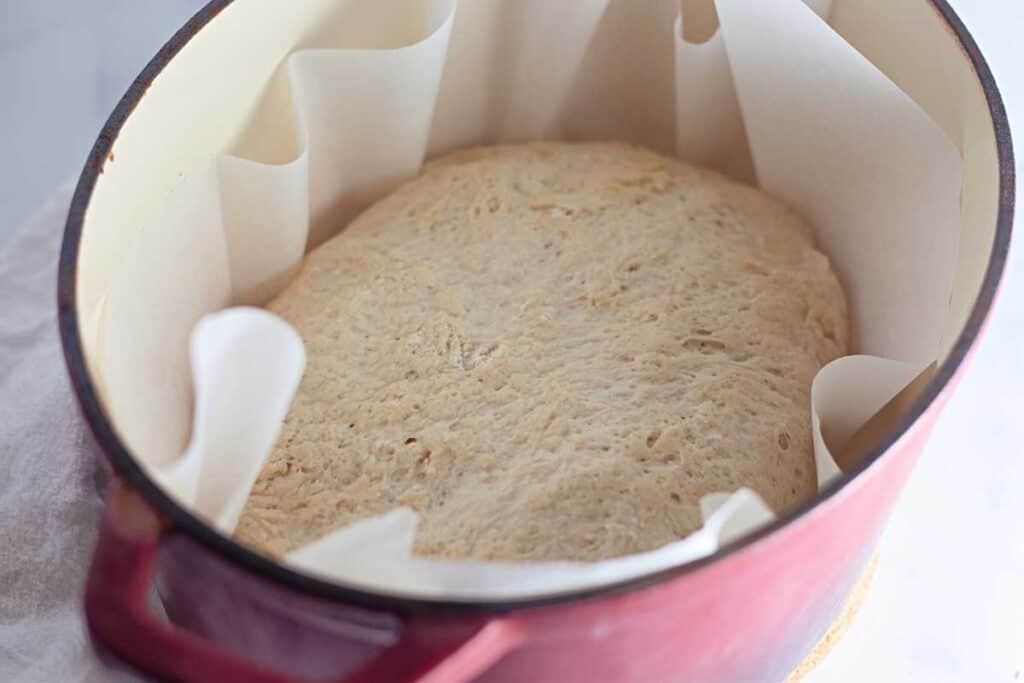
- Preheat oven to 470 with empty Dutch oven (affiliate link) and lid inside as it preheats.
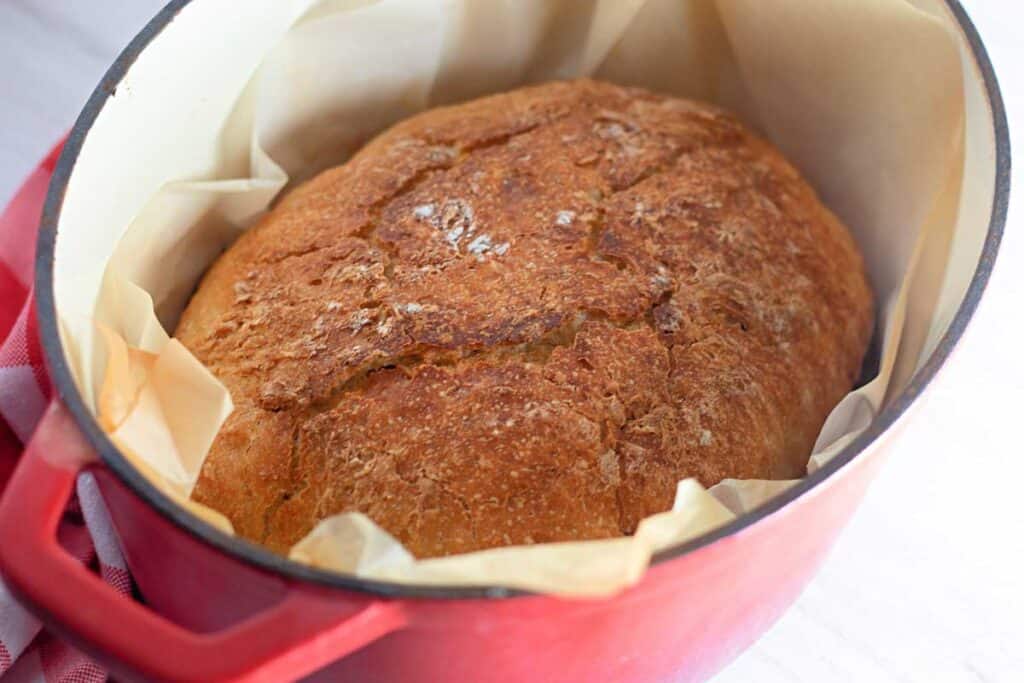
- Once the oven is preheated, carefully remove the Dutch oven (affiliate link) and lower the dough AND parchment paper into the Dutch oven (affiliate link). Cover carefully with hot lid.
- Bake for 30 minutes covered, then remove lid and bake an additional 10-15 minutes or until bread is golden brown.
- Remove from oven and cool on a wire rack for 30 minutes before slicing.
Tips for best results
- If your house is cold, I recommend preheating your oven for just a few minutes, then turning it off and placing the dough in the oven to rise. If your oven is occupied you can heat a mug of water in the microwave for 2 minutes then place the bowl of dough in the microwave with the mug and shut the door.
- Be VERY careful handling the hot Dutch oven (affiliate link) and lid, they are very heavy and will be extremely hot.
- You may substitute honey for the sugar if desired.
FAQs
You must use a Dutch oven for this recipe, a regular bread pan will not work. We recommend a 5 to 7 quart Dutch oven. The Dutch oven ensures a crispy, crusty outer surface and a soft interior
You must use the parchment paper for this recipe, do not omit it or try to use wax paper or aluminum foil, it will not work.
The bread needs to bake in a closed, humid environment to keep the bread moist inside while achieving that artisanal crust on the outside. The lid traps the steam inside the Dutch oven for the first portion of the baking time, giving you the perfect bread texture!
You can make this with bread flour if you have it on hand. You can also substitute up to one cup of the flour with whole wheat flour if desired.
Do not use non-wheat flour like almond flour or coconut flour, those will not work with this recipe. I have not tested it with gluten-free baking mixes.
Storage
This bread is best eaten fresh but you can keep leftovers in an airtight container at room temperature for up to 3 days.
You can easily freeze Dutch oven (affiliate link) bread for up to 3 months. Wrap tightly in two layers of plastic wrap and store in a freezer bag. Thaw overnight in the refrigerator.
You can also freeze individual slices on a plate or baking sheet after they are completely cooled then transfer them to a freezer bag. Thaw for 15-30 seconds in the microwave.
Serving suggestions
This bread can be eaten on its own with butter, jam, or your favorite toppings. You can also serve it on the side of a hearty soup like our Instant Pot Beef Stew, Crock Pot Guinness Beef Stew, White Chicken Chili, or Broccoli Cheese Soup.
This bread is also delicious made into a grownup sandwich or grilled cheese, as toast, or served with a topping like bruschetta or artichoke dip!
If you try this recipe please comment and rate it below, I love hearing from you!
If you liked this recipe, you’ll love my free 5-Ingredient Dinner Challenge.
I’ll send you super simple meals that use just five ingredients and come together fast — perfect for busy weeknights when you don’t want to overthink dinner.
No Knead Dutch Oven Bread
- Total Time: 2 hours 45 minutes
- Yield: 10 slices 1x
Description
No knead Dutch oven (affiliate link) bread is a deceptively easy recipe for a crusty, artisan loaf of bread. The 5 simple ingredients mix up in just 5 minutes, there is no kneading to messy your hands, and only a short two hour rise time. Once you try this easy bread recipe you’ll be a convert!
Ingredients
- 2 cups warm water (105-110F)
- 1 tablespoon granulated sugar
- 1 envelope (1/4 ounce) dry active yeast
- 4 cups all-purpose flour
- 1 tablespoon salt
- olive oil for greasing the bowl
Instructions
- Combine warm water, sugar, and yeast in a small bowl and set aside for 5 minutes or until frothy. You want the water about 100 degrees, I recommend using a meat thermometer to check it if you aren’t sure if it is warm enough.
- In a large mixing bowl combine flour and salt, stir to mix.
- Add yeast mixture to flour mixture and stir to form the dough. (See note below)
- Grease a separate large bowl and transfer the dough to the second bowl to rise. Turn the dough in the bowl to lightly coat with oil on all sides.
- Cover the dough with a clean towel or paper towels and set in a warm place to rise for 2 hours, or until doubled in size.
- Dust a large pice of parchment paper lightly with flour. Turn the dough out onto the paper and form into an oval. Cover and allow to sit at room temperature as the oven preheats.
- Preheat oven to 470F with empty Dutch oven (affiliate link) and lid inside as it preheats.
- Once the oven is preheated, carefully remove the Dutch oven (affiliate link) and lower the dough AND parchment paper into the Dutch oven (affiliate link). Cover carefully with hot lid.
- Bake for 30 minutes covered, then remove lid and bake an additional 10-15 minutes or until bread is golden brown.
- Remove from oven and cool on a wire rack for 30 minutes before slicing.
Notes
If the dough is too sticky to handle after mixing, add more flour 1 tablespoon at a time until less sticky. If the dough seems too dry, add water 1 tablespoon at a time until the dough comes together into a shaggy ball.
- Prep Time: 5 minutes
- Cook Time: 40 minutes
- Category: bread
- Method: Baking
- Cuisine: American
Nutrition
- Serving Size:
- Calories: 189
- Sugar: 1.4 g
- Sodium: 699 mg
- Fat: 0.5 g
- Carbohydrates: 39.7 g
- Fiber: 1.5 g
- Protein: 5.5 g
- Cholesterol: 0 mg

Hi,
This is a question.
I’m just wondering if the yeast in this recipe can be substituted with sourdough starter?
I don’t have any packages yeast… sourdough starter is all that I have. Also, if it can be used could you please share your thoughts on the best way to incorporate it…I’ve got my very 1st sourdough ball proofing in the refrigerator, it has to be in there for 14 hours at min! The instructions were way too wordy and actually annoying and hard to follow. It hasn’t risen hardly at all since 10:30pm last night it’s 11:15 now. So don’t think I’ll be using this again.
I made bread years ago and it raised in a few hours then it raised a few more hours then I baked it! Simple!!! Just how I like it!
I really want to try your recipe today…but as I mentioned, I don’t have packaged yeast.
If it’s not possible to make your bread with sourdough that’s fine (sadly)….please let me know. Thanks, Bobbi…one who loves fresh warm homemade bread dearly!!! 🧘🧘🧘🧘🥖🍞🥖🥐🥖🥰😁
Hi Bobbi, I’m sorry I’m not much help because I have not tried it myself but I would think you could use it but you would need to reduce the flour and water to make up for what is already in the starter so it would be somewhat of an experiment!