How to Clean, Refresh, and Seal Your Grout (Easily and Cheaply!)

It’s easier than you think to clean your grout. With this tutorial, you can not only clean your grout but seal it to prevent stains too!
Next month will mark one year since we moved into our new construction home. When we were in the building process and went to the flooring supplier to pick our finishes I distinctly remember them telling us that they would not be sealing our grout.
Fast forward to the holidays and when the baby caused $5000 worth of water damage to the house by flushing a roll of toilet paper. Yeah, I was really wishing I had sealed that grout once the flooding permanently stained it.
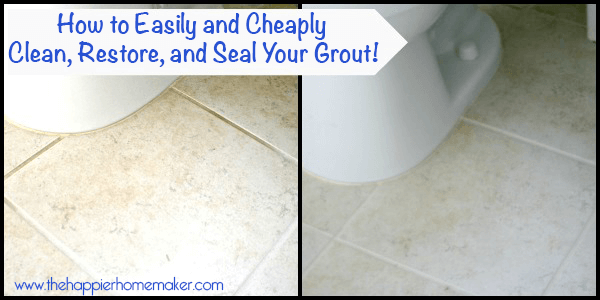
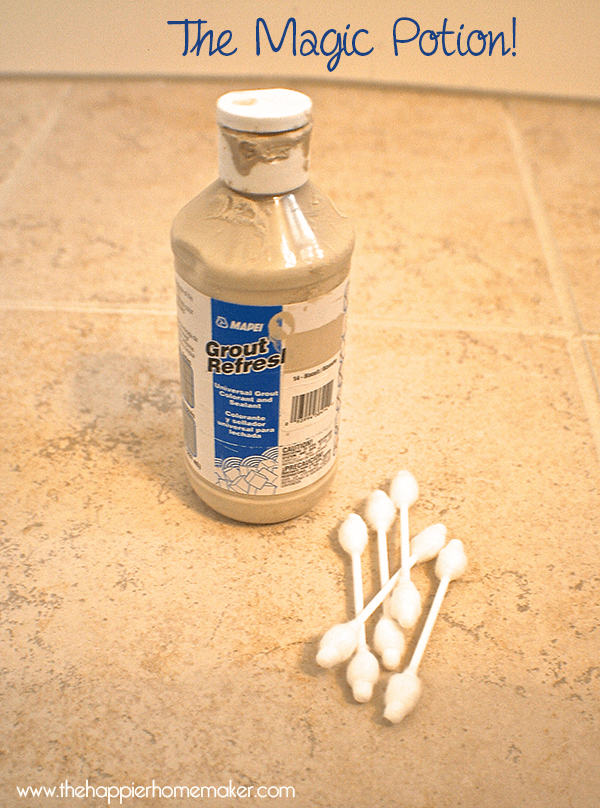
Luckily the insurance company paid for the restoration and the tile specialist introduced me to this awesome stuff called Grout Refresh. I decided this past week that it was time to tackle the boy’s bathrooms because as you can see above..little boy lack of, ummmm, aim, has made their tile pretty cringe-worthy!
Supplies
- Gloves
- Sponge
- Dish Soap and/or mild cleaner such as Soft Scrub
- Grout Refresh – I got my Grout Refresh for less than $15 and one bottle was more than enough to cover two standard full bathrooms.
- Toothbrush/utility brush/cotton swabs – I used Q-tips to apply my Grout Refresh but you can use a toothbrush or gloved hand just as easily.
Clean the Grout
It’s important to thoroughly clean the grout before you seal it so you don’t lock the yuck in!
- Mix dish soap and hot water and apply to the grout with a toothbrush. Let it sit 10-15 minutes.
- Brush the grout with a toothbrush and use a sponge and clean water to remove all of the soap mixture.
- If it doesn’t come clean consider a gentle cleaner like Soft Scrub.
Seal Grout
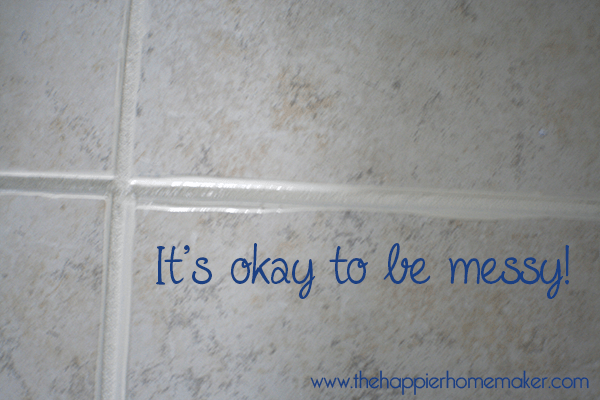
- Simply cover all the grout with the Grout Refresh-no need to be super neat-it won’t hurt to get it on the tile. The instructions tell you to wait 30-60 minutes after application and spritz with water. I can personally vouch that if you get busy with life and forget about it for, oh, 24 hours or so-that’s just fine!
- Spritz the grout with water and then wait five minutes.
- Scrub off the excess with a sponge. The Grout Refresh will easily clean off the tile while leaving the grout looking good-as-new! The actual labor time for each bathroom was less than an hour.
- Let the floors dry completely before walking on them.
And here is the difference again:
Isn’t it a huge (and totally less cringe-worthy) result? I wish I would have done it as soon as we moved in but I had no idea it would be so easy and so inexpensive!
Tips for best results
- don’t rush, it can be tedious but it is worth it in the end
- wear gloves to protect your hands
- use a gardener’s knee pad or folded towel to protect your knees
- sealers don’t last forever, plan on resealing floor grout every 3-4 years, less for shower grout
Have you sealed your grout? Anybody else have the same “little boy” issues I do? Bleh!

How have you been cleaning your tile now that you used this grout renew? With vinegar and water? Tile cleaner?